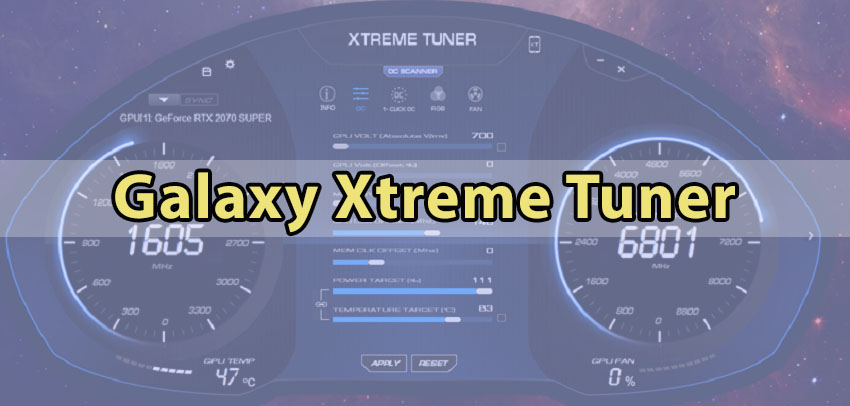
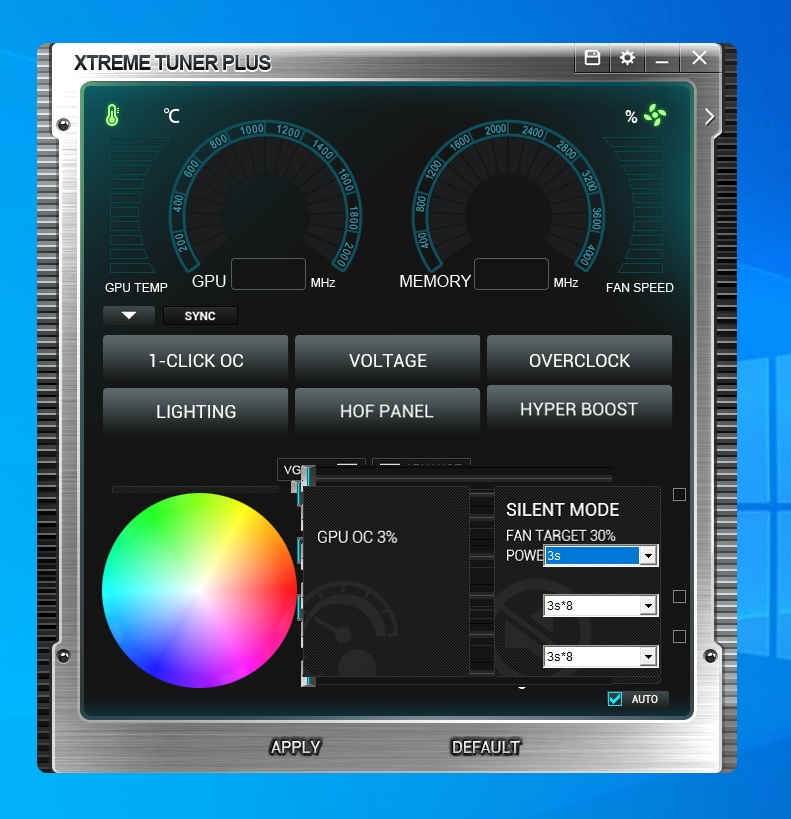
If you’re a PC gamer or enthusiast, you know how important it is to have a well-performing graphics card. A graphics card, or GPU, is responsible for rendering the graphics on your screen, and a higher-performing GPU means smoother and better-looking games. However, not everyone can afford the latest and greatest graphics card. That’s where Galaxy Xtreme Tuner comes in. This software allows you to optimize and customize your GPU settings to get the best possible performance out of your hardware. In this article, we’ll provide a step-by-step guide on how to use Galaxy Xtreme Tuner to get the most out of your graphics card.
System Requirements:
Before we get started, let’s make sure your system meets the minimum requirements for Galaxy Xtreme Tuner:
- Windows 7 or higher
- NVIDIA GeForce GTX 400 series or higher
- AMD Radeon HD 5000 series or higher
- 2GB of RAM
- 200MB of free disk space
If your system meets these requirements, you can download the latest version of Galaxy Xtreme Tuner from the official website. Once the download is complete, double-click on the setup file to start the installation process.
Interface:
When you first launch Galaxy Xtreme Tuner, you’ll see the main interface of the software. It’s divided into several sections, each of which provides different features and settings. Let’s take a look at each section:
- GPU Clock:
This section allows you to adjust the clock speed of your GPU. You can use the sliders to increase or decrease the clock speed. You can also adjust the voltage of your GPU using this section. - Memory Clock:
This section allows you to adjust the memory clock of your GPU. You can use the sliders to increase or decrease the memory clock speed. You can also adjust the voltage of your memory using this section. - Fan Control:
This section allows you to adjust the fan speed of your graphics card. You can use the sliders to increase or decrease the fan speed. You can also set a custom fan curve using this section. - Temperature:
This section displays the temperature of your graphics card. You can monitor the temperature in real-time using this section. - Overclock Profile:
This section allows you to create and save custom overclock profiles. You can create a profile for different games or applications and switch between them as per your requirement.

Overclocking:
Now that you’re familiar with the interface of Galaxy Xtreme Tuner, let’s move on to overclocking your graphics card. Overclocking is the process of increasing the clock speed and memory speed of your graphics card to get better performance. However, overclocking can also cause your graphics card to overheat and reduce its lifespan. So, it’s crucial to be careful while overclocking your graphics card.
Here are the steps to overclock your graphics card using Galaxy Xtreme Tuner:
- Launch Galaxy Xtreme Tuner and go to the GPU Clock section.
- Use the sliders to increase the GPU clock speed by a small amount, for example, 10MHz.
- Click on Apply to save the changes.
- Go to the Memory Clock section and repeat the same process to increase the memory clock speed.
- Monitor the temperature of your graphics card using the Temperature section. If the temperature is too high, reduce the clock speed to lower the temperature.
- Test the stability of your overclock using a benchmarking tool like FurMark or Unigine Heaven. Run the benchmark for at least 10 minutes to ensure stability.
- If the benchmark runs successfully, increase the clock speed and memory speed by another small amount, for example, 5MHz.
- Repeat steps 5-7 until you find the highest stable clock speed and memory speed for your graphics card.
- Once you’ve found the stable clock speed and memory speed, save the settings using the Overclock Profile section. You can create multiple profiles for different games or applications.
- Finally, test your overclocked graphics card in real-world scenarios by playing games or running heavy applications. If you experience any stability issues or crashes, reduce the clock speed and memory speed until you find a stable setting.
Fan Control:
In addition to overclocking, you can also use Galaxy Xtreme Tuner to adjust the fan speed of your graphics card. A higher fan speed means better cooling for your graphics card, which can improve performance and extend its lifespan. However, higher fan speed can also increase noise levels.
Here are the steps to adjust the fan speed using Galaxy Xtreme Tuner:
- Launch Galaxy Xtreme Tuner and go to the Fan Control section.
- Use the sliders to increase or decrease the fan speed as per your requirement. You can also set a custom fan curve by clicking on the “Custom” button.
- Click on Apply to save the changes.
Temperature Monitoring:
Galaxy Xtreme Tuner also provides real-time temperature monitoring for your graphics card. It’s essential to monitor the temperature of your graphics card while overclocking or gaming to prevent overheating and reduce the risk of damage.
Here are the steps to monitor the temperature using Galaxy Xtreme Tuner:
- Launch Galaxy Xtreme Tuner and go to the Temperature section.
- The software will display the real-time temperature of your graphics card.
- Monitor the temperature while overclocking or gaming to ensure it doesn’t exceed safe levels.
Conclusion:
Galaxy Xtreme Tuner is an excellent tool for optimizing and customizing your graphics card settings. However, it’s essential to be cautious while overclocking and monitor the temperature of your graphics card to prevent damage. We hope this guide has helped you understand how to use Galaxy Xtreme Tuner to get the most out of your graphics card.