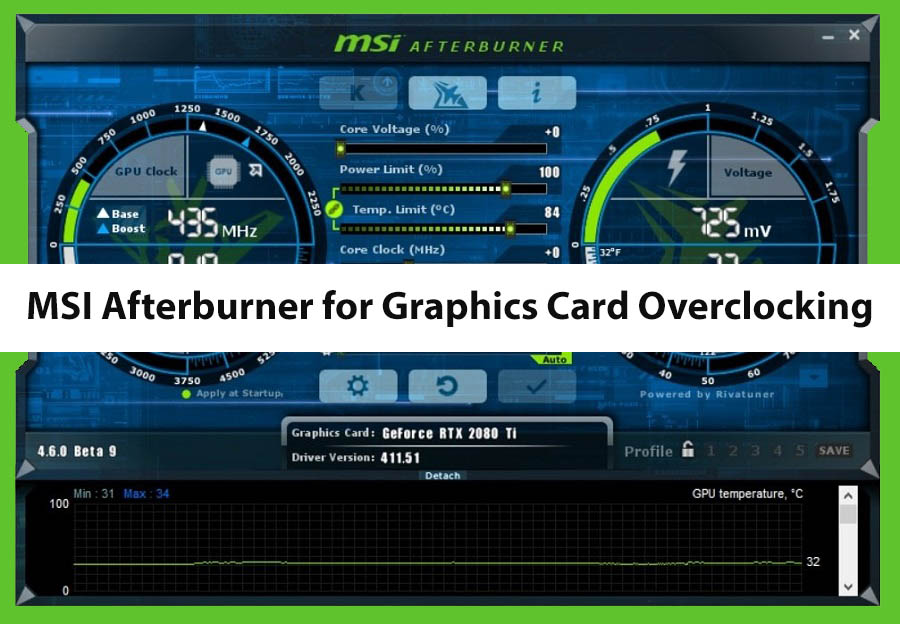
MSI Afterburner is a powerful graphics card overclocking and monitoring tool that can help you get the most out of your hardware. This free software is easy to use and can be used to adjust the clock speed, voltage, and fan speed of your graphics card. In this article, we will provide a comprehensive guide on how to use MSI Afterburner for graphics card overclocking and monitoring.
What is MSI Afterburner?
MSI Afterburner is a graphics card overclocking and monitoring tool that is compatible with all graphics card models. The software allows you to adjust the clock speed, voltage, and fan speed of your graphics card to improve its performance. It also allows you to monitor your system’s performance, including temperature, usage, and clock speeds.
Advantages of Using MSI Afterburner
There are several advantages to using MSI Afterburner for graphics card overclocking and monitoring:
- Free: MSI Afterburner is a free software that offers powerful overclocking and monitoring features.
- Compatibility: MSI Afterburner is compatible with all graphics card models, making it a versatile tool.
- User-Friendly: The software has a user-friendly interface, making it easy for beginners to use.
- Customization: MSI Afterburner allows you to customize your graphics card settings to achieve optimal performance.
How to Use MSI Afterburner for Graphics Card Overclocking and Monitoring
- Download and Install MSI Afterburner
First, download and install MSI Afterburner from the official website. Once the installation is complete, open the software. - Adjust Clock Speed
To adjust the clock speed of your graphics card, click on the “Core Clock” or “Memory Clock” sliders on the main interface. Move the sliders to the right to increase the clock speed or to the left to decrease it. You can also use the keyboard arrows to adjust the values. - Adjust Voltage
To adjust the voltage of your graphics card, click on the “Core Voltage” slider on the main interface. Move the slider to the right to increase the voltage or to the left to decrease it. Be careful when adjusting the voltage, as too high a value can damage your hardware. - Adjust Fan Speed
To adjust the fan speed of your graphics card, click on the “Fan Speed” slider on the main interface. Move the slider to the right to increase the fan speed or to the left to decrease it. You can also enable “Automatic Fan Control” to let MSI Afterburner adjust the fan speed based on the temperature of your graphics card. - Monitoring
To monitor the performance of your graphics card, click on the “Monitoring” tab on the main interface. Here, you can view the temperature, usage, clock speeds, and other performance metrics of your graphics card. You can also customize the monitoring graph to display the metrics that are important to you. - Apply Settings
Once you have adjusted your graphics card settings, click on the “Apply” button to save the changes. You can also save the settings as a profile, so you can easily switch between different configurations.
Conclusion
MSI Afterburner is a powerful graphics card overclocking and monitoring tool that can help you get the most out of your hardware. The software is free, compatible with all graphics card models, and has a user-friendly interface. By following the steps outlined in this article, you can use MSI Afterburner to adjust the clock speed, voltage, and fan speed of your graphics card, as well as monitor its performance metrics.


Comments
zoritoler imol
Brandon George